Tips and News

View all
Get to Know the Fox!
CT_School: Simple Guide on How to Manage MetaMask

Everyone interested in NFT has at least once heard about the MetaMask wallet! That is not a surprise — it is one of the most popular crypto wallets in the NFT industry! But it can be quite challenging for those starting their NFT journey! So let us go through it together and get to know the wallet better!

Contents

What is MetaMask?

MetaMask is one of the most well-known Ethereum wallets. Designed as a browser plugin and mobile app, it allows users to store NFT and cryptocurrency as well as send it in standard transactions.

How to Get Started in MetaMask?

Starting in MetaMask is fairly easy but it does require some time:

First Step: Install MetaMask. Various browsers support the wallet: Chrome, CryptoTab, Firefox, and Edge. You can also install it on your mobile device!

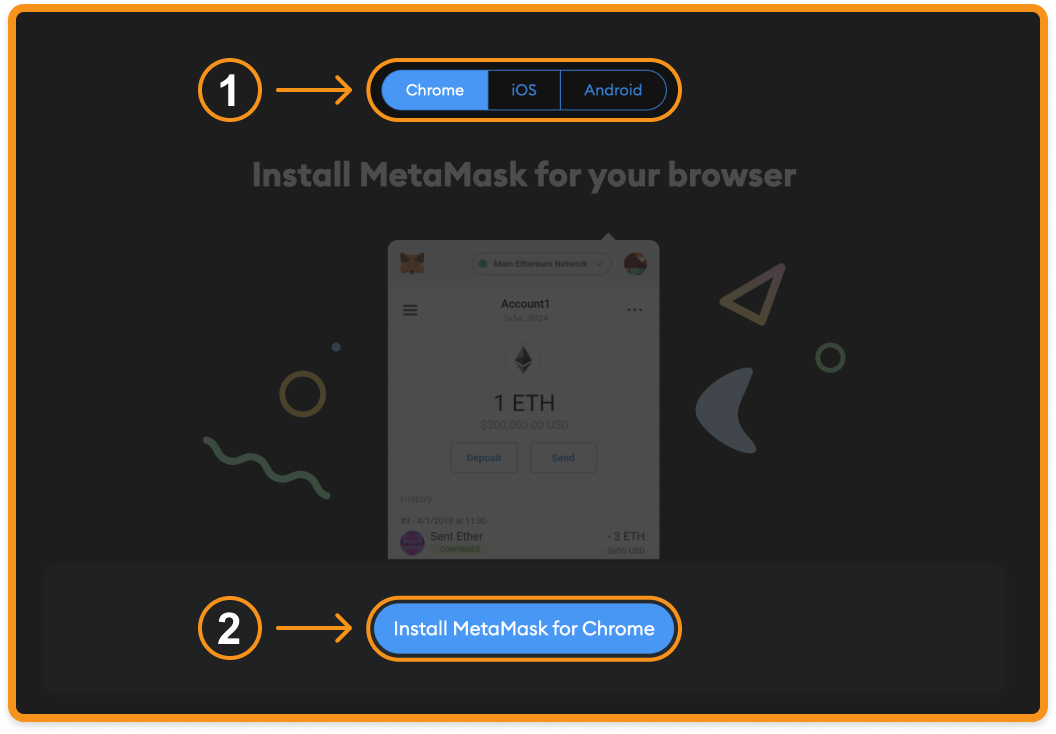
Second Step: Once installed click on the MetaMask icon in your browser’s toolbar to open it. Then click on Get Started.

Note: MetaMask can sometimes take some time to load so be patient.

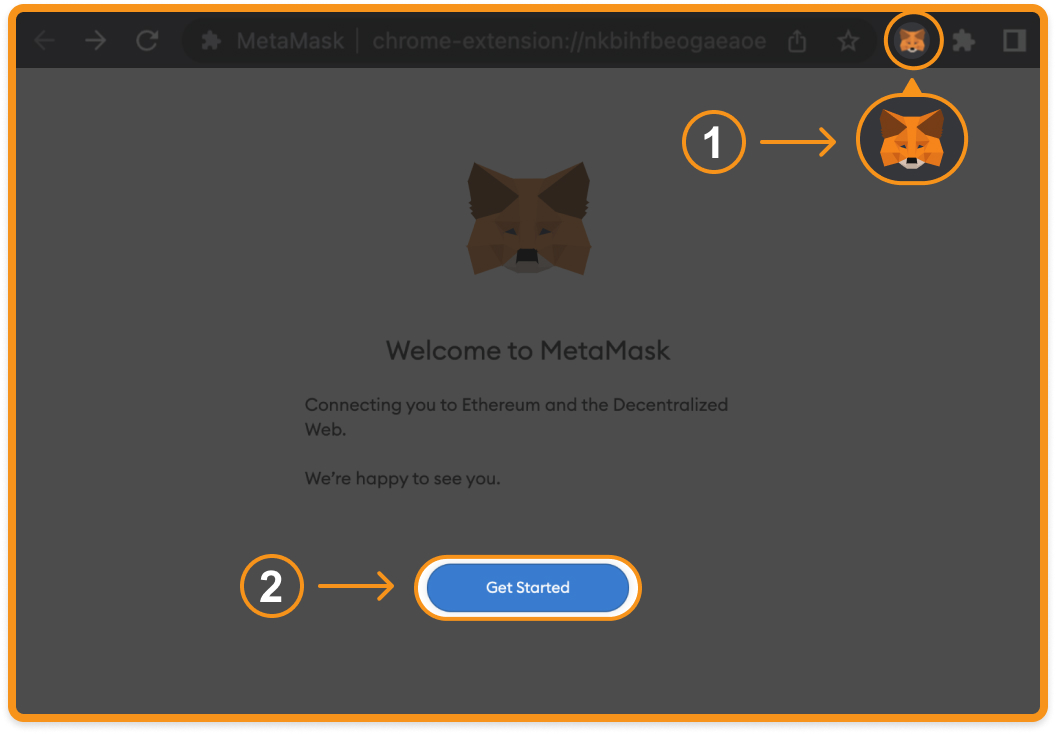
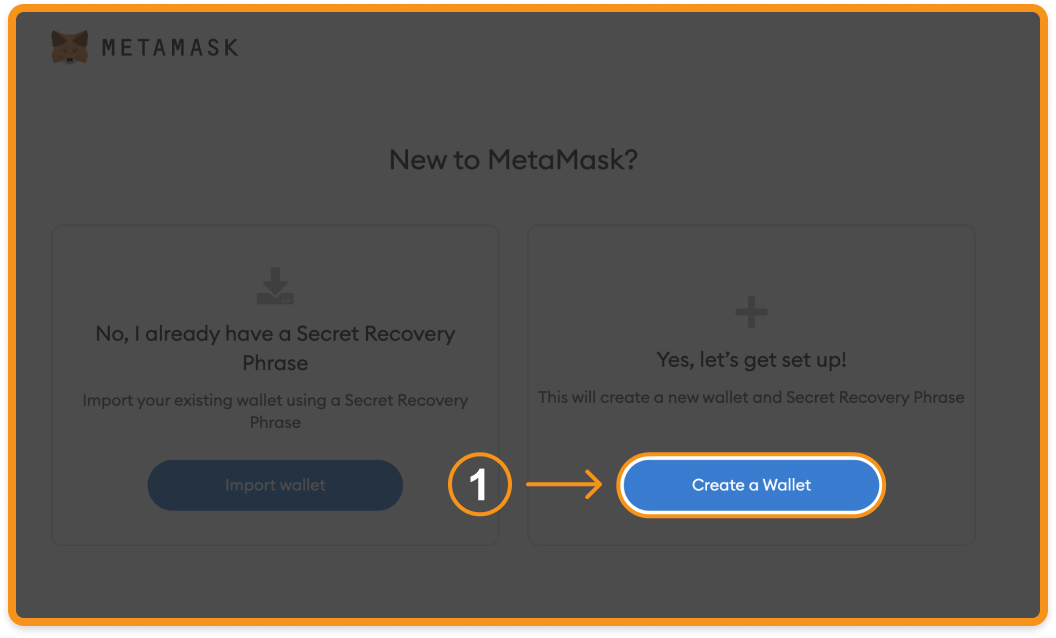
Third Step: Click on Create a Wallet.

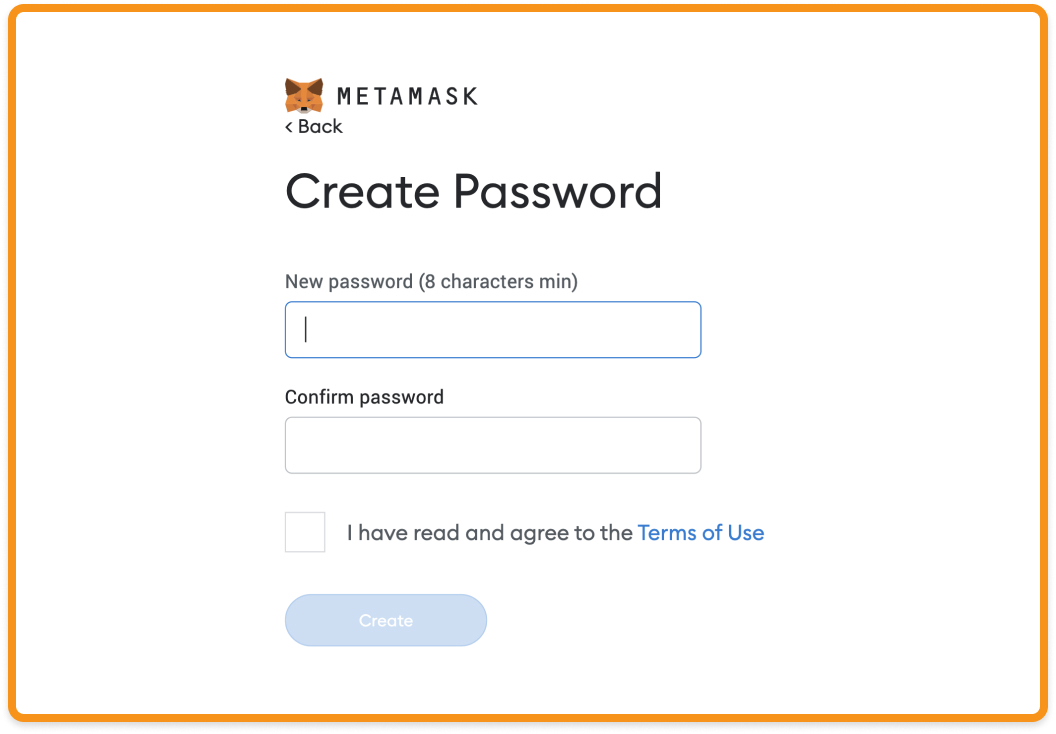
Fourth Step: Create a password. Be sure to keep it safe. Though, if you forget it you can still regain your access to the wallet!

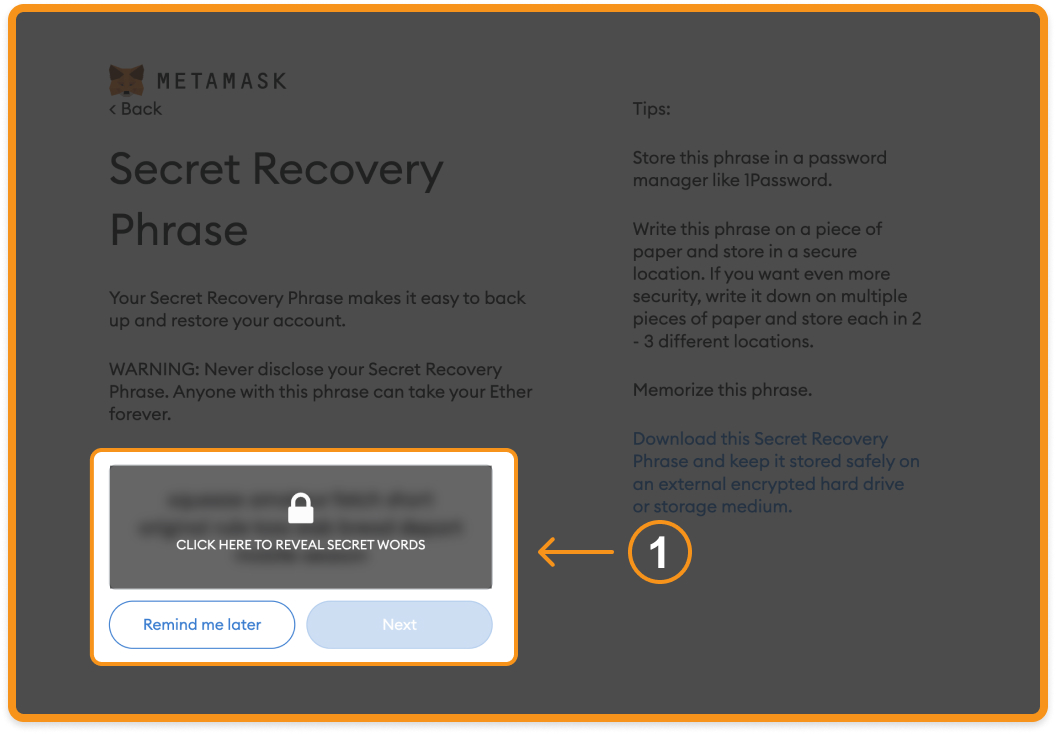
Fifth Step: It is time for private keys! Those are important and have to be protected well — private keys are essential part of your wallet.

Anyone who has them can access your wallet and funds!

Click on the gray area, remember the order of the phrases, and then repeat it on the next screen.

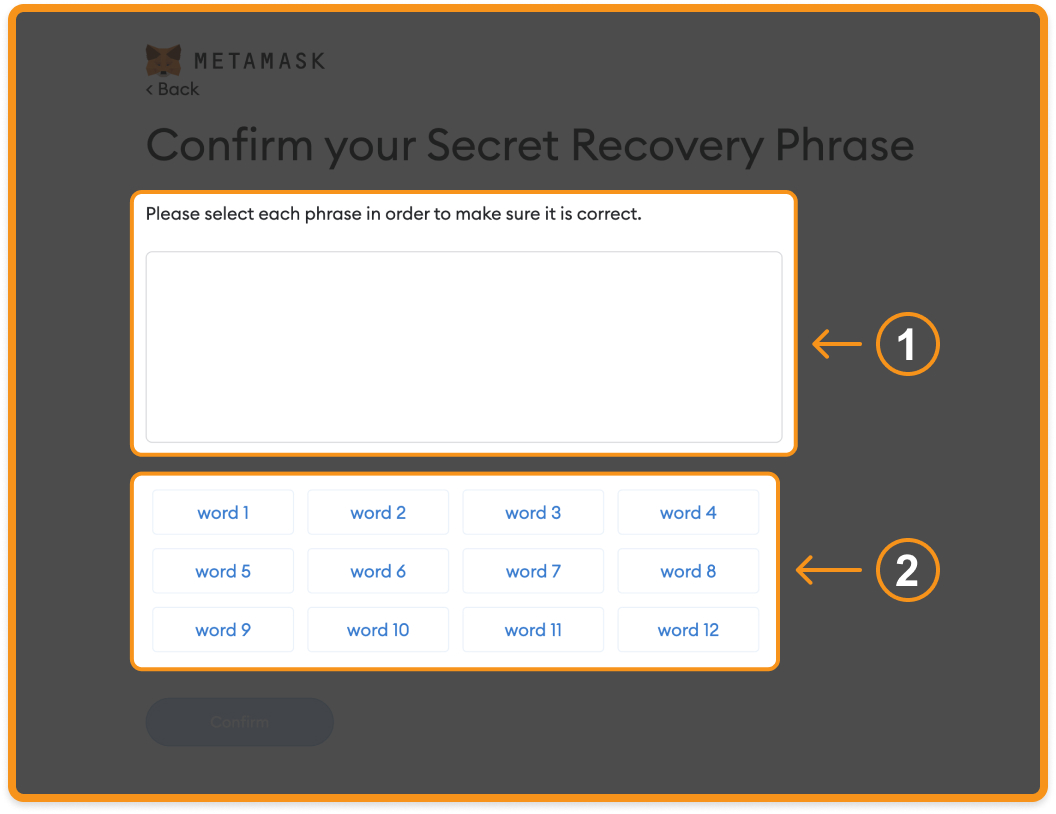
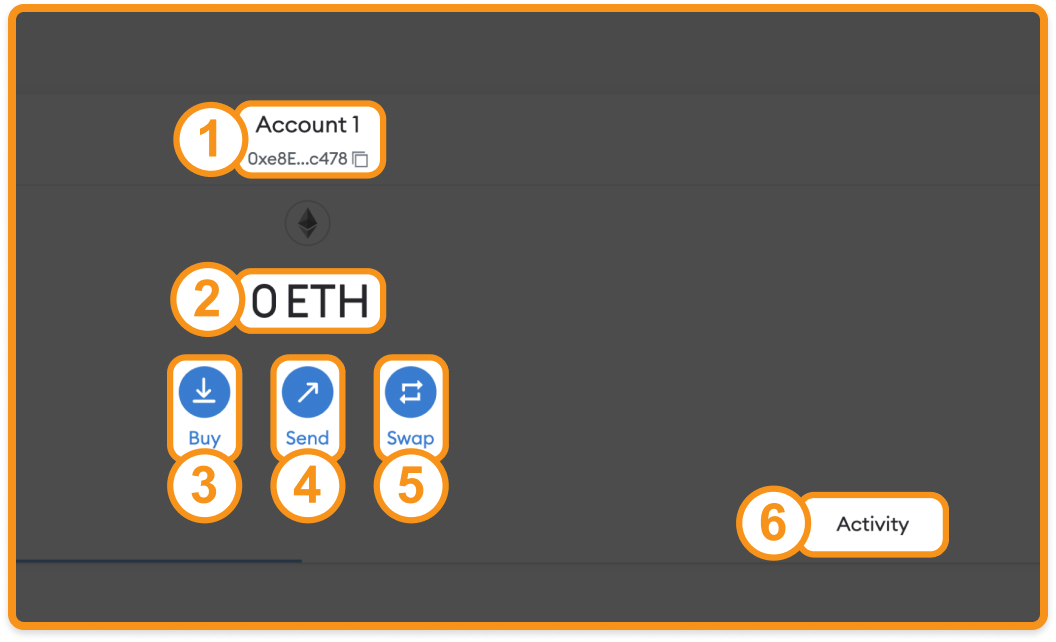
That is all! Now you have your own MetaMask wallet!

What Can You Find on your MetaMask Wallet?

  • Your wallet address. Click on it to copy.
  • Your current ETH balance.
  • Click Buy to purchase cryptocurrency using suggested services.
  • Click Send if you want to send your funds to other users or transfer them to your other wallet.
  • Click Swap to exchange your ETH for other cryptocurrencies.
  • Click Activity to the history of your transactions.

How to Use MetaMask in CT NFT on PC?

First Step: Create a MetaMask wallet.

Second Step: Go to the CT NFT dashboard, click Connect MetaMask, and confirm the action in the pop-up window.

Note: sometimes this window can appear under your browser window or not appear at all — check for the blue notification on the plugin and click on it.

Third Step: Sign the signature request from CryptoTab and approve adding Polygon Network.

Fourth Step: Enter your email address in the appeared window. Then open the mailbox, find the letter from CryptoTab, open it, and click on the link to complete.

That is all! Your MetaMask wallet is connected to CT NFT!

Now you are all set and ready to enter the world of NFT. Start building your token collection while getting BTC income with CT NFT!

MORE ABOUT CT NFT

Published: Aug. 9, 2022